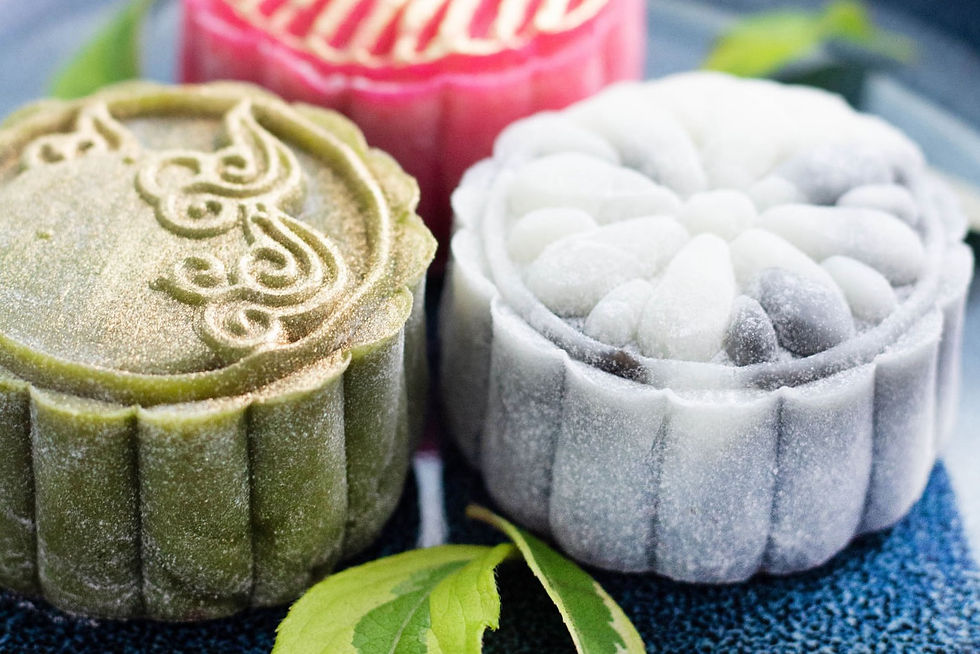
Snowskin Mooncakes
- Sep 9, 2022
- 7 min read
Updated: Jun 11, 2023

Where do I begin with my love story for mooncakes? As a kid, I only ever had traditional baked mooncakes, with lotus paste and a salted egg yolk center, or red bean paste. As someone with an undeniable sweet tooth, I would be giddy with excitement when my dad brought them home. Being a paediatrician, he would receive them as gifts of gratitude from his patients' parents. This was how mooncakes and I crossed paths, and we've been kindred spirits eversince.
My good friend and co-worker at the time, Scott, nudged me to make some at the bakeshop back in 2013. I reluctantly agreed, brainstorming how I could make them slightly different, and introduce them to our customers. Over the years, we innovated, I leaned in more into my culture and heritage in terms of flavour combinations and style, and it remains, till today, one of the most exciting times for me at the bakeshop, year after year.
I am so thrilled to share these recipes with you now, so you may have a little Soirette magic during the Mid-Autumn Festival in your home, to share with your family and loved ones. Happy Mid Autumn Festival!
Snowskin Mooncakes 3 ways
Black Sesame & Mung Bean
Red Bean & Rose
Thai Milk Tea & Brown Sugar Pearls
Yield: Around 30 mini mooncakes - 50g size (small)
Prepare Ahead: Yes (red bean needs to be soaked overnight for best results)
Tools Required
Kitchen scale
Mooncake mold press (50g size)
Immersion blender or Smoothie blender
Sieve
Rolling Pin
Black Sesame & Mung Bean Filling:
Ingredients:
100g black sesame seeds, freshly toasted until really fragrant!
90g icing sugar
50g mung beans (soaked in water for about 3 to 4 hours, and drained)
1/8t salt
2 Tablespoons glutinous rice flour
100g water
Method:

In a smoothie blender, mix the icing sugar and black sesame seeds and process until really fine.
In a heat proof bowl, add 2 tablespoons of water to the soaked and drained mung beans. Cover with plastic wrap and steam for about 30 minutes, until soft.
In a tall jug (about 1 litre capacity), mix the salt, glutinous rice flour and water. Add the cooked mung beans black sesame mixture and blend well. At this stage, I put the mix through a sieve for a finer paste.
In a medium frying pan, cook out the filling until it starts pulling away from the pan. It needs to resemble a dough that you would be able to form later as a filling for the mooncakes.
Remove from the heat, let it cool (place plastic wrap over the filling to prevent a skin from forming). Refrigerate to set for about 4 hours, preferably overnight.
Red Bean & Rose Filling:
Ingredients:
200g red beans (azuki bean), soaked in water overnight
1 1/2 cups water
125g sugar
1/2 cup vegetable oil
2 teaspoons rosewater
1 Tablespoon cornstarch (mixed to dissolve in 2 teaspoons of water)
Method:

Wash the soaked red beans several times until clean.
In a saucepan, place the beans and water and bring to a boil. Feel free to add some water if you feel you need to as the water starts to evaporate. Once boiling, turn the heat down to a simmer and cook (30 to 40 minutes) until the beans are soft.
Drain the excess water. Cool the beans and process in a food processor, until smooth (or you could leave it a little chunky if you prefer that texture). Push the paste through a sieve to get rid of the skin from the bean.
Add the sugar and mix thoroughly.
In a frypan, place the sugar - bean mixture. Once it is hot and you see steam emerging, stir in half the oil. Keep stirring until fully incorporated. Repeat with the remaining oil. Once fully incorporated, keep stirring constantly until the mix is pulling away from the pan. You are looking for a soft dough consistency. Add the rosewater and cornstarch mix and stir for another minute or two.
Remove from the heat, let it cool (place plastic wrap over the filling to prevent a skin from forming). Refrigerate to set for about 4 hours, preferably overnight.
Thai Milk Tea & Brown Sugar Pearls:
Ingredients:
1/4 cup tapioca pearls (your favourite brand, cook according to instructions)
This is a useful blog I found about it: 30/30 Technique for Boba
1/2 cup brown sugar
1/4 cup water
25g cake flour
35g cornstarch
40g sugar
40g condensed milk
50g salted butter, melted
18g thai tea leaves
180g coconut milk
Method:

Make the syrup for the pearls:
In a saucepan, combine the brown sugar and water. Bring to a boil, stirring to dissolve. Cook until it has the consistency of maple syrup. Alternatively, you could use maple syrup to sweeten the pearls too!
Prepare a steamer on the stove. You can use a large pot, with about an inch of water in it, and a vegetable steamer placed inside.
Bring the coconut milk and Thai tea leaves to a boil. Cover and steep for 1/2 hour. Strain well, pressing out as much of the coconut milk as you can. Remeasure to 100g.
In a heat proof bowl, place cake flour, cornstarch, sugar, condensed milk and Thai tea coconut milk. Whisk until smooth. Add the melted butter and continue whisking till homogenized.
Place the bowl with the plastic wrap into the steamer. Cover and steam for about 25 to 30 minutes. Use caution to remove from the steamer!
Once out of the steamer, leave to cool slightly, until you feel comfortable with the temperature. The dough needs to be kneaded for about 2 to 3 minutes, while still warm.
Place plastic wrap over the filling to prevent a skin from forming. Refrigerate to set for about 2 hours.
Snowskin Dough:
Ingredients:
65g icing sugar, sifted
230g whole milk / coconut cream at room temperature
30g vegetable oil (neutral oil)
55g glutinous rice flour (+ 50g, toasted in a pan until fragrant-reserve for later)
40g rice flour
35g cornstarch
Method:
Prepare a steamer on the stove. You can use a large pot, with about an inch of water in it, and a vegetable steamer placed inside.
In a stainless steel bowl, mix all the ingredients together with a whisk. Cover with plastic wrap and rest for about 30 minutes.
Place the bowl with the plastic wrap into the steamer. Cover and steam for about 25 to 30 minutes.
Be careful when you check it at 30 minutes. Everything will be hot! Use caution and lift out the bowl. With a spatula, stir the mixture. It should be slightly translucent and solid. If the top is a little wet, you can mix it and recover, steam for another 5 minutes.
Once out of the steamer, leave to cool slightly, until you feel comfortable with the temperature. The dough needs to be kneaded for about 2 to 3 minutes, while still warm. Use a little of the toasted glutinous rice flour if it is sticky. I used a scraper. A spatula works well too!
Form it into a 1" thick square and wrap it with plastic wrap. Place it in the fridge to chill. It will be ready to use in about 2 hours.
**TIP** For matcha snowskin, use 1 tablespoon matcha for 1 batch. If you are making this sized recipe, remove 1/3 of the mix (before letting it stand) and mix in 1 teaspoon of good quality matcha. Steam the 2/2 portion for about 20 minutes, and then the matcha portion for about 12 to 15 minutes. Allowing it to stand for longer should not affect the outcome.
ASSEMBLY:
Now comes the fun part!
For a 50g mooncake, I usually measure 35g for the filling, and 15g for the snowskin.
Black Sesame & Mung Bean (makes approximately 8 to 10)
Portion the Black Sesame filling to 35g.
Measure out 150g for 10 portions of the snowskin. Portion to 15g each.
Dust the rolling surface with a little bit of the cooked glutinous rice flour. You could also use a silpat and roll out the dough on it, dusted with a little of the cooked glutinous rice flour.
Place the filling in the middle of the rolled out snowskin, wrap gently to form a ball.
Dust the outside with the flour, and dust the mold press as well. Place the ball on the surface, and place the press on top of the ball. Bring it down to the surface. Apply a little bit of pressure to ensure your beautiful print appears on the surface of the mooncake.
Gently release and coax the mooncake out.
Decorate with any edible decoration you fancy!
Red Bean & Rosewater (makes approximately 8 to 10)
Portion the Red Bean filling to 35g.
Measure out 150g for 10 portions of the snowskin. Portion to 15g each.
Dust the rolling surface with a little bit of the cooked glutinous rice flour. You could also use a silpat and roll out the dough on it, dusted with a little of the cooked glutinous rice flour.
Place the filling in the middle of the rolled out snowskin, wrap gently to form a ball.
Dust the outside with the flour, and dust the mold press as well. Place the ball on the surface, and place the press on top of the ball. Bring it down to the surface. Apply a little bit of pressure to ensure your beautiful print appears on the surface of the mooncake.
Gently release and coax the mooncake out.
Decorate with any edible decoration you fancy!
Thai Milk Tea & Brown Sugar Pearls (makes approximately 8 to 10)
Strain the pearls.
The filling should be at room temperature before using. Knead till pliable.
Portion the Thai Milk Tea filling to 30g (to make room for the bubbles)
Flatten a portion of the filling, scoop a few pearl into the center. Wrap it gently, smoothing out any cracks by pinching the dough together.
I used a little bit of pink food colouring for the snowskin. Knead till pliable.
Measure out 150g for 10 portions of the snowskin. Portion to 15g each.
Dust the rolling surface with a little bit of the cooked glutinous rice flour. You could also use a silpat and roll out the dough on it, dusted with a little of the cooked glutinous rice flour.
Place the filling in the middle of the rolled out snowskin, wrap gently to form a ball.
Dust the outside with the flour, and dust the mold press as well. Place the ball on the surface, and place the press on top of the ball. Bring it down to the surface. Apply a little bit of pressure to ensure your beautiful print appears on the surface of the mooncake.
Gently release and coax the mooncake out.
Decorate with edible gold, or any edible decoration you fancy!
Storage
These mooncakes are always best fresh! The Black Sesame mooncakes and the Red Bean mooncakes can be kept in an airtight container in the fridge for a maximum of 4 days. The Thai Milk Tea mooncakes should be enjoyed almost straight away, as the pearls then to toughen over time.


Comments